

How to Upload Staff Documents
In addition to allowing individuals to upload documents directly to their Registry profiles, the upload utility allows employers to upload documents to their staffs’ profiles. Once documents are uploaded, Registry personnel will review the documents, verify the information, and enter verified data into the individual’s Education and Training Report. Administrators on the Registry can see this report under the Staff Education and Training Report located in Program Administration. For employers participating in QRIS (Quality Counts California), the education and training data is calculated into QRIS scores for each staff with education and training on file. This score should be used as a tool to determine if there may be missing qualification documents but raters still need to assess qualifications.
To manage staff data and upload education and training documents, employers, or their administrative designees will need Employer Administrative Access. To gain Administrative Access, login to your Registry profile and click on Employer Admin Request.
NOTE: Be sure to read and follow the on-screen instructions carefully to ensure timely processing of your Employer Administrative Access Request.
First, to ensure that duplicate documents are not submitted, click on Program Administration, then Staff Education and Training Report to view summary education and training data, or on Staff Confirmation to view the source documents for current employees.
To upload employee documents:
- Login to the CA ECE Workforce Registry at www.caregistry.org.
- Click on Program Administration on the left navigation menu.
- Scroll down to “Uploaded Documents.”
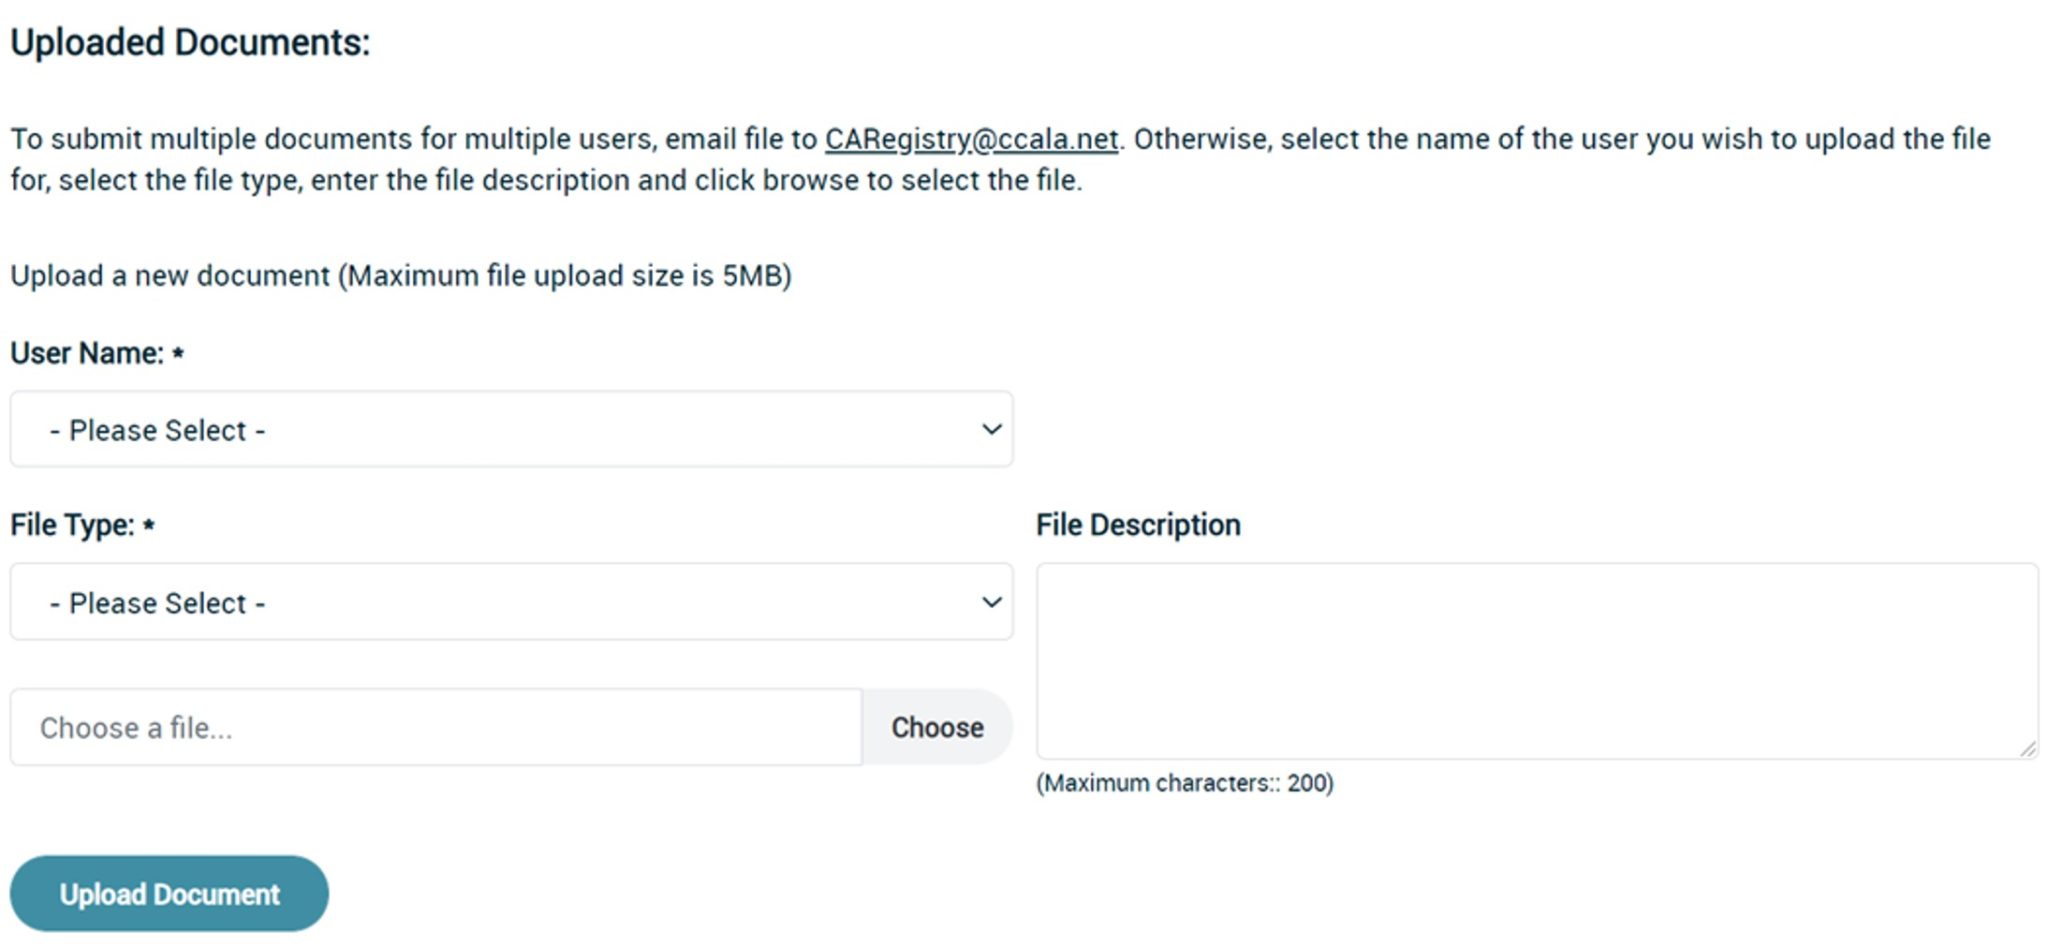
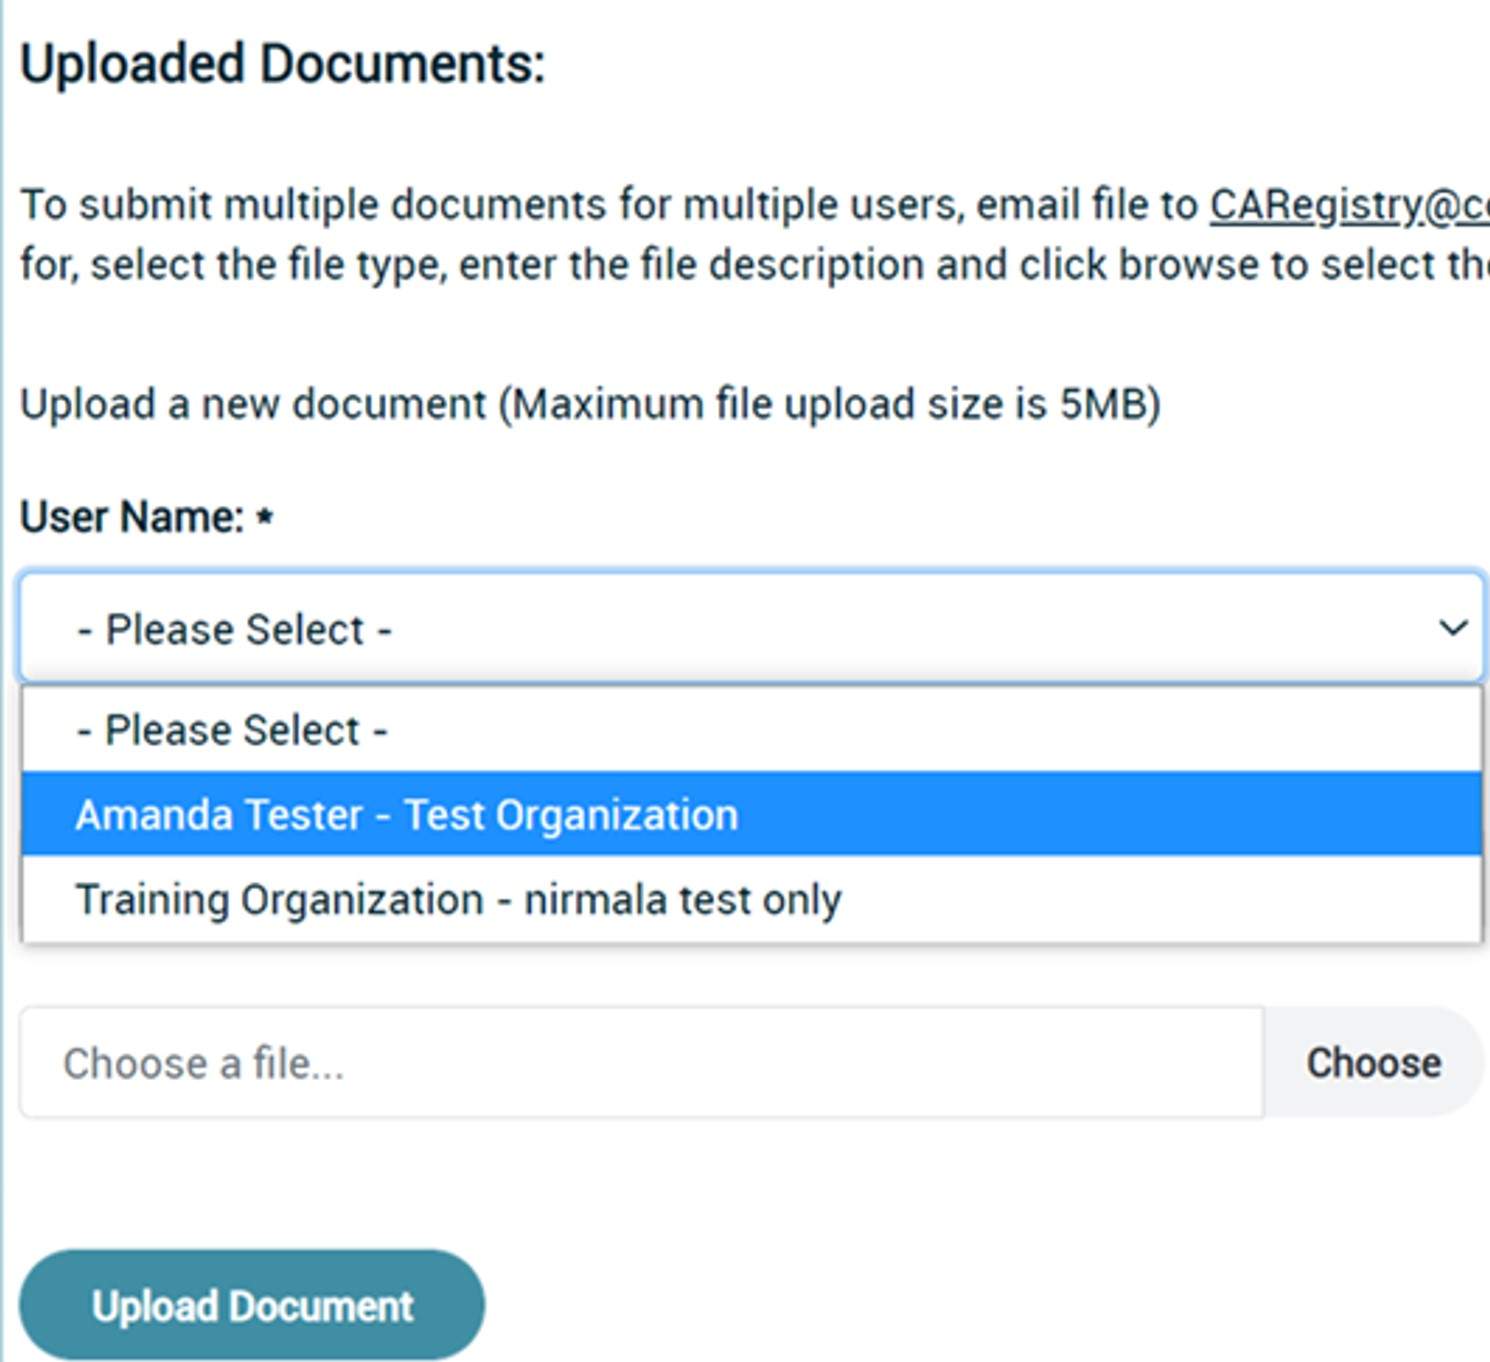
- To upload a file, click on User Name to see a current list of employees in alphabetical order, and select an employee:
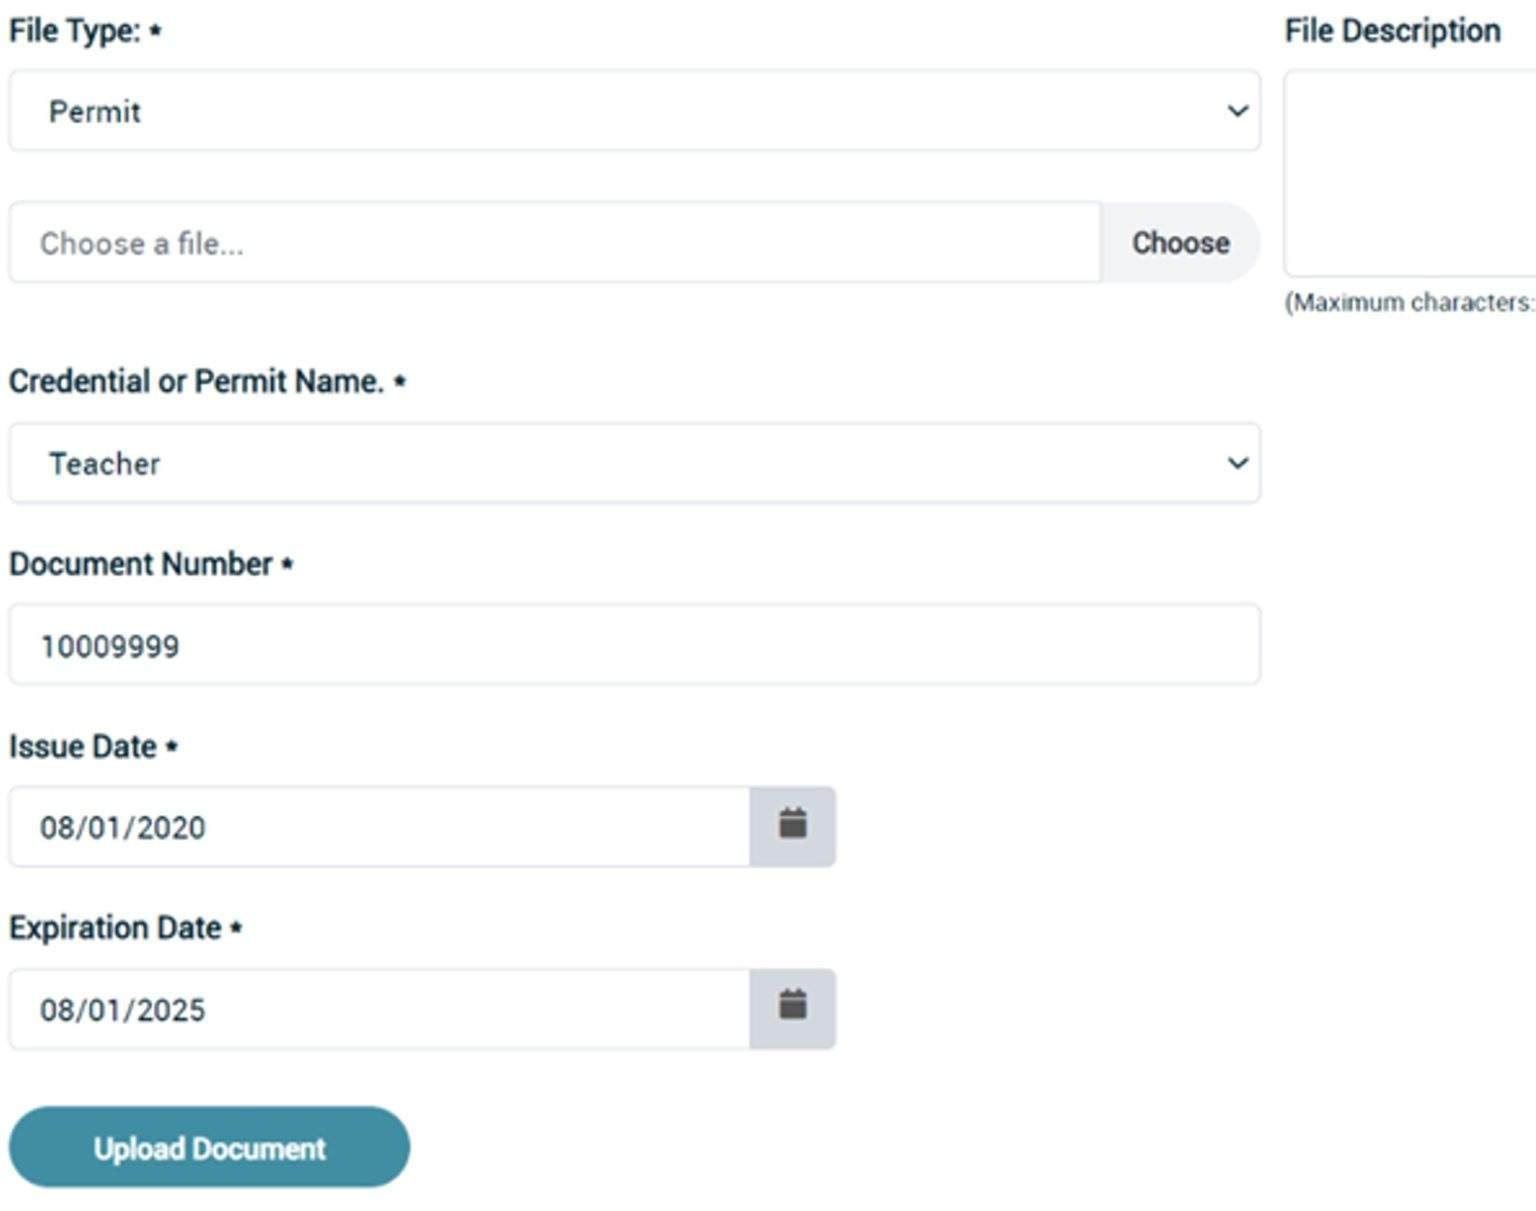
If CA Child Development Permit or CA Teaching Credential is selected, additional fields are displayed for data entry
- Select Permit/Credential Name
- Type in Document Number located on the permit or credential
- Enter Issue Date and Enter Expiration Date
NOTE: To ensure the verification of your staff’s permit/credential, please be sure to accurately enter this information.
- After, select Choose file and you may add a brief description of the document, such as permit type, high education institution that issue the transcript, etc. It is not a required field.
- Click Upload Document. You will see the document under Uploaded Documents with Unverified status. The document’s status will change to Verified once Registry staff complete the verification process.
Please allow 6 to 8 weeks for the verification of your staff’s documents.
The uploaded document will be visible to the employee and under Staff Confirmation for that employee.